Welcome to the Apothecary

To go to my website click the link: apothecarygreens.weebly.com

NOTE: The information in this blog does not constitute the practice of medicine, and does not replace the advice of your health care provider.

Showing posts with label DIY. Show all posts

Saturday, 9 May 2015

DIY: Lavender infused oil

I love Lavender, the plant, the flowers, the aroma. As an essential oil it has many uses, and in herbal complimentary remedies it is also extremely useful. It can be consumed as a tea or in cooking used to sweeten cakes and biscuits! What an amazing plant.

Today I have infused some Lavender flowers in olive oil, so i can strain off the pieces and use the oil in lip balm.

Here is how to make your own infused lavender oil.


Using a cup of Lavender flowers, pack them into a sterilised clear jar.


Cover with carrier oil (virgin olive oil is cheap and works well) seal jar tightly and shake lightly.  place in a warm sunny spot (window sills are ideal)

Every day give the jar a shake, leave them in this spot for 2-3 weeks at least.

Then strain the infused oil into a dark glass bottle if stored in a cool dark place it will last for up to a year.

LABEL IT!

.........................................................................................................................
 NOTE: The information in this blog does not constitute the practice of medicine, and does not replace the advice of your health care provider.

Monday, 26 January 2015

DIY: Healthy hair and scalp pre-shampoo treatment

I was recently writing up an assignment for an Aromatherapy refresher course I am doing, I used my recipe for pre-shampoo hair treatment as an example in the assessment.  I thought maybe other people may be interested in it too. (the recipe, not my assignment!)

I use this treatment for thirty minutes to an hour or so before I wash my hair to help keep my scalp nice and clean, free from dandruff, and healthy, and to add some shine and natural oils back to my hair to help prevent it becoming dry and brittle.  It is very easy to mix up, the ingredients are easy to locate in stores and the treatment oil can be stored in a dark cool cupboard (or a fridge if you want a more solid consistency) for up to a year after making it, and it really works to improve hair condition!

Coconut oil is readily available in supermarkets in the health food aisle, and in health food stores. When  stored below 24 degrees Celsius the oil solidifies and becomes a fine hard waxy consistency, at temperatures higher than that it becomes a fine almost transparent oil.

Rosemary oil can be found in health food stores, and online from aromatherapy suppliers. If you wish to purchase essential oils try Galaxy Aromatherapy, as she is a qualified aromatherapist and can also provide information about the oils she sells. '


To make the hair treatment oil, I use 1 cup of liquid (above 24 degrees Celsius) coconut oil and add to it 5 drops of Rosemary essential oil, and 1 drop of Vitamin E oil.

I stir the essential oil and Vitamin E into the coconut oil and then pour it into a sterilised jar and keep it in the fridge until I need it. I like to use it when it is a little firm rather than completely liquid, which is why I store it in the fridge. 

It is applied to the scalp, massaged in well, and then combed through to the ends of the hair with a wide toothed comb.

Hair is tied back (if long) and the treatment left in for thirty minutes to an hour before being shampooed out.

Rosemary oil helps to alleviate dandruff, and stimulates hair follicles to assist in strong healthy hair growth, the Vitamin E oil helps to improve the texture and overall health of the hair strands, and the coconut oil is a good treatment against moisture loss in hair.

Rosemary Leaves


.........................................................................................................................
 NOTE: The information in this blog does not constitute the practice of medicine, and does not replace the advice of your health care provider.

Tuesday, 13 January 2015

DIY: creme base for moisturisers

Making your own moisturisers means you know what has gone in them! There are no mystery synthetic harsh chemicals and you will find you can make really effective bases for lotions and moisturisers economically!

Ingredients for a creme or lotion base

[the ratio is 1 part of beeswax, to 2 parts of water, to 4 parts of oil]

10 grams beeswax
40 ml sweet almond oil
20 ml water

Method


  • In a double saucepan, slowly melt the beeswax and almond oil until combined 
  • While you are doing this, heat the water in another pan until it reaches around 36 to 37 degrees celcius
  • remove both pans from heat
  • gradually add the heated water to the oil and wax,  while beating the mixture to combine the three ingredients
  • Keep beating until a cream consistency is achieved
  • Allow to cool


Once the base creme/lotion has cooled you can add your essential oils or herbal infusions to create your moisturisers!

Place the moisturiser (or the creme base) into dark coloured sterilised glass containers and store in a cool dark spot!


.........................................................................................................................
 NOTE: The information in this blog does not constitute the practice of medicine, and does not replace the advice of your health care provider.

Thursday, 14 August 2014

DIY: cold oil herbal infusions

Preparing your own oil infusions to use in home made balms and creams will save you money, and the added bonus is you know what you are putting in them!

This method will take some time from start to when you can use it, but it is the method I prefer unless I am in a hurry!

Chop up your chosen herbs (they need to be dried) *
pack them into a sterilised clear jar
cover with carrier oil (virgin olive oil is cheap and works well)
seal jar tightly and shake lightly
place in a warm sunny spot (window seals are ideal)
every day give the jar a shake
leave them in this spot for 2-3 weeks at least
Then strain the infused oil into a dark glass bottle
if stored in a cool dark place it will last for up to a year
LABEL IT!


* The reason I suggest that the herbs used to create an infusion are dried is that any moisture added into the infusion via fresh (damp) vegetation can introduce moulds or bacteria into the infusion. For safety reasons i prefer to use dried herbs.

.........................................................................................................................
 NOTE: The information in this blog does not constitute the practice of medicine, and does not replace the advice of your health care provider.

DIY: Bruise Balm

Bruise balm - set in the containers 
I don't know about you, but I am really clumsy, if there is something to trip over or fall on, I am there! This means I bruise, sprain, and injure myself quite frequently.

I prefer to make my own remedies wherever possible, especially for minor injuries or illnesses. (of course i see a Medical Professional/Doctor when the injury or illness is serious - I take a balanced view in healing and know when to bring in the big guns..)

I have an ointment i use in my herbal first aid kit, (there are many ointment recipes that are of use to treat bruises and sprains, this is just one of them), that I created a while back and I find it really effective to help alleviate pain and swelling on minor sprains, strains and bruises.

DO keep it away from open wounds and your eyes, this stuff contains ginger and cayenne and will STING!

I wanted to share it with you, (I published this recipe originally  my website: apothecarygreens.weebly.com)


Bruise balm - just poured into containers and cooling


This balm must not be used on broken skin (as it may sting!) Useful for bringing out and soothing bruises, sprains and external muscle and joint inflammation. Be cautious if you have any allergies to any of the ingredients.  Please seek the assistance of a health care professional  when needed.

INGREDIENTS
100 ml oil infused arnica flowers
50 ml oil infused chamomile flowers
50 ml oil infused ground ginger root
50 ml oil infused dried cayenne
beeswax
1 vitamin E capsule
containers
labels
saucepan
measuring jug/scales

METHOD

  • with a saucepan on a LOW heat add the infused oils (to make 250 ml of combined oil)
  • add 25 grams of beeswax
  • melt the beeswax stirring it through
  • turn the heat off and add the contents of the Vitamin E capsule, stir through
  • then pour the mixture into sterilised containers
  • leave to cool before you put the lids on!
  • label the containers with what it is what it is used for, when it was made, any cautions it needs, (e.g. do not use near eyes or open wounds), the best before date and the creation date.
  • The vitamin E will preserve the ointment so it will last up to twelve months if stored in a cool dark place
USES
apply to bruises, sprains, sore backs as needed.
be careful not to apply on or near open wounds and keep away form your eyes! (cayenne stings!)

HOW IT WORKS

  • Arnica: helps to reduce swelling, brings bruises up to the surface to encourage healing
  • Chamomile: helps to reduce inflammation and is calming to the skin
  • Ginger: warming, pain relief, encourages blood flow to the injury to promote healing
  • Cayenne: warming, pain relief, and encourages blood flow to promote healing

.........................................................................................................................
 NOTE: The information in this blog does not constitute the practice of medicine, and does not replace the advice of your health care provider.

Friday, 8 August 2014

DIY: ointments

Some of the information on how to create a basic ointment was originally posted on my website.

Ointments are a good way to apply herbal remedies topically, they can be carried around in small pots and applied as needed. Unlike creams that are made with a mix of water and oil, ointments are made with oils and wax/animal fats/petroleum jelly.  Ointments are also known as salves or balms, and are not just the province of Herbalists. Arnica balm for example can be purchased from pharmacies to apply to bruised skin to help relieve and bring out bruises.

Making ointments is easy, here is a basic recipe.

What you need

  • 250 ml carrier oil 
  • herbs of choice (chopped fresh or dry herbs)
  • 25 grams beeswax
  • sterilised containers
  • saucepan
  • funnel
  • labels

Method

  • in a saucepan on a low heat, add the carrier oil and herbs
  • heat very slowly, simmering at a low heat for about two hours
  • strain the herb infused oil through muslin cloth and put the oil back in the saucepan
  • still on a low heat add the chopped up beeswax
  • allow to melt, stir through
  • then pour into dark glass jars
  • allow to cool then put the lids on
  • label the jars with date made, ingredients, what it is used for, and the use by date
  • Ointments made this way will keep for about four to six months if stored in a cool dark place.
NOTE: if you add some Vitamin E oil to this mixture you can increase the shelf life to up to a year.
old ointment jar (origin of photo unknown)


.........................................................................................................................
 NOTE: The information in this blog does not constitute the practice of medicine, and does not replace the advice of your health care provider.

Saturday, 26 July 2014

DIY: Raspberry Leaf facial toner

Following a comment I made on my facebook profile about how I make raspberry leaf facial toner, I had 14 requests to provide the instructions to make it.  Including from my friends Chelsea (from Australia)  and Jenn (from America) - 'Hi ladies!'. 

I decided that others may want the DIY instructions for this too, so here it is!

What you need


  • dry or fresh red raspberry leaves
  • vodka or apple cider vinegar
  • water
  • a large heat proof jar
  • muslin cloth (or other fine cloth to strain the liquid)
  • kettle (to heat water)
  • funnel (to decant toner easily)
  • sterilised jars or bottles to store the toner


What you do


  • In a heat proof jar place one cup of raspberry leaves
  • boil some water and add one cup of water to the leaves
  • stir
  • add 1/4 cup of vodka or apple cider vinegar (this preserves the liquid)
  • leave in a dark spot for at least 4 hours (can be left to infuse for up to a week)
  • Once you are happy with the strength of the infusion strain through muslin cloth that has been draped over and in a funnel.
  • decant into small dark bottles or jars
  • label them with the contents and the date made (with vodka it can last for up to 2 years at least, with apple cider vinegar the use by time is usually halved)

What it is good for

Red raspberry leaves have a high amount of tannins giving them an astringent property making them good for minimising pores, reducing inflammation, and soothing irritation. They are also rich in Polypeptides, a type of Amino Acid, known to assist in cell regeneration, making the leaves good for reducing wrinkles and healing scar tissue.


How to use it

As a facial toner, place an amount of the infusion onto a cloth or cotton bud and wipe over face after cleansing. Leave to dry then apply moisturisers/ sunscreen as you normally do.

As a sunburn soother, apply liberally to effected area, to assist in soothing and healing the sunburn. repeat as needed.

NOTE: there are many ways to make facial toner, this is just one way; I use this method as it is quick, easy, and does not require any speciality tools to create it!

raspberry leaf


When I cannot obtain fresh raspberry leaves I buy them dried from MudBrick Cottage.

.........................................................................................................................
 NOTE: The information in this blog does not constitute the practice of medicine, and does not replace the advice of your health care provider.

Thursday, 24 July 2014

DIY: Rosehip oil

Rosehip oil, when topically applied, is useful for treating dry skin, to help prevent wrinkles, to assist superficial burn scars to heal, to minimise scarring, to treat acne, and treat excema.

To make rosehip oil at home you only need a few things.

UTENSILS
A large saucepan
A small saucepan
A funnel
A dark glass bottle
Piece of clean muslin

INGREDIENTS
Rosehips (fresh or dried) chopped up into small pieces
Carrier oil (such as almond oil or apricot oil)
Water

METHOD
Put about two centremetre depth of water in the large saucepan, and place on a stove top on lowest heat.
Place the small saucepan inside the large saucepan
Into the small saucepan add your rosehips and your oil(the ratio is one part rosehips to two parts oil)
Place a lid on the small saucepan
Allow the mixture to steep on the low heat for four hours (check the water level in the big saucepan occassionally to ensure it hasnt boiled dry)
Turn the heat off and allow the mix to cool
Place the funnel into the dark bottle
Place the muslin cloth lightly into and over the funnel
Carefully pour the rosehip oil mix into the bottle through the muslin (to strain the rosehip bits out)
Then cap the bottle and store in a cool dark place.

(The rosehip bits can be discarded, they are good in the compost bin)

The rosehip oil can be used as it is and applied to the skin as an intesive moisture treatment and scar reducer. It can also be used as a base for balms and lotions.

This is a quick and easy method to make rosehip oil, I make mine this way and am always pleased with the results.

Why not try it for yourself?

.........................................................................................................................
 NOTE: The information in this blog does not constitute the practice of medicine, and does not replace the advice of your health care provider.
Saturday, 10 May 2014

DIY: rose and herb perfume air freshener


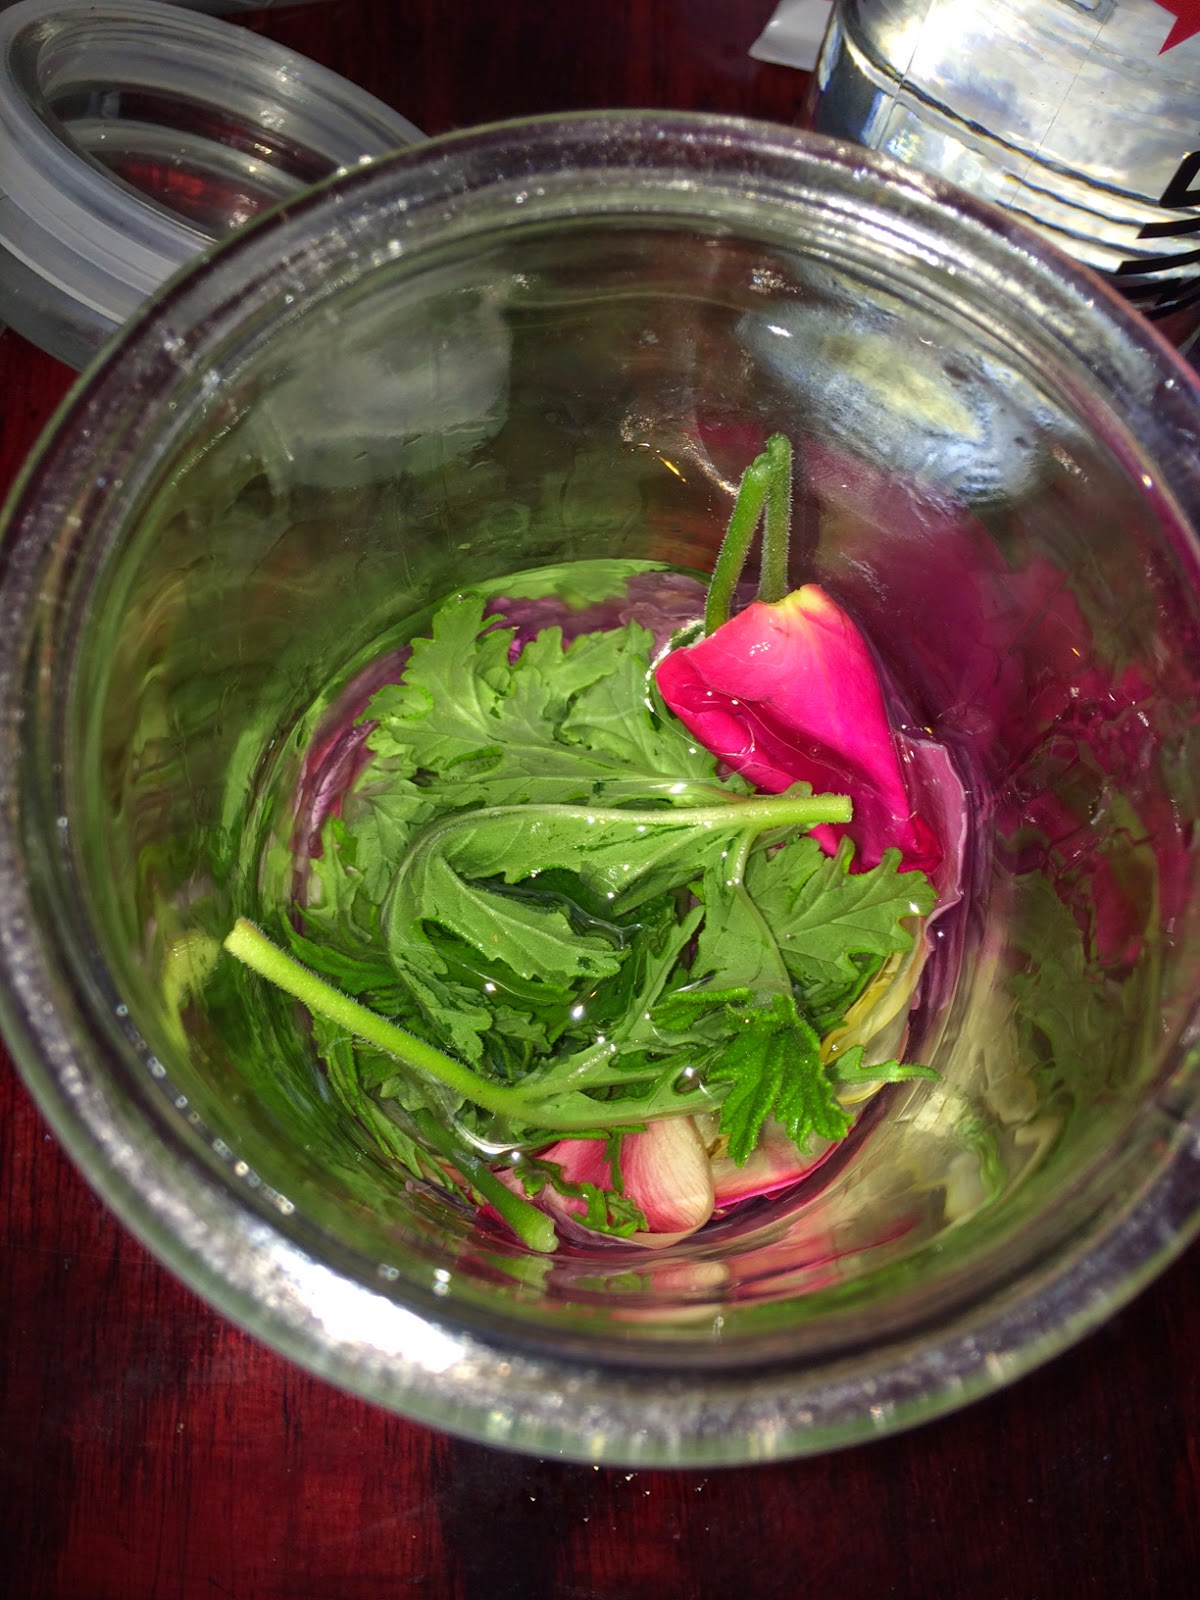
Make a beautiful air freshener from the beautiful flowers and herbs growing in your garden. We have the pre-Winter roses all in bloom, and some fresh scented Pelargoniums, as well as lots of herbs. I love the smell of all these plants and wanted to capture the smell to use in the house, especially over winter when the garden isn't as full of scent!

There are many different ways to make your own perfumes at home, but one of the easiest is this way.

WHAT YOU NEED
  1. petals and scented leaves (freshly picked)
  2. cheapest you can find Vodka
  3. Large jar with a silicon seal lid
  4. Cloth to strain the liquid
  5. Dark spray top bottle
METHOD
  • Pick the petals and leaves that you wish to make your perfume from, pick the healthiest looking that are full of fragrance, knock off any ants and other insects that may be hanging out on the plants!
  • Put them on a paper towel just to dry off a bit, (we are not drying the plant life here, just drying off any dew)
  • Place the plant pieces into a large clean dry jar using a wooden spoon or similar, push the plants down to squish them up a bit. ( I used fresh mint, scented pelargonium, and rose petals)


  • Add enough vodka to cover all the plants
  • Put the lid on and place the jar in a cool dark spot for a few days

  • After it has sat for a few days, add some more fresh petals and scented leaves, mush them down a bit, and top of the vodka if needed
  • Again place the jar in a dark cool place
  • After a few weeks take the jar and strain it through a fine cloth (muslin cloth  or even a 'Chux' cloth will work)
  • Once the liquid is strained so that there are no large vegetation blops left in it, pour it into a dark spray topped bottle, so the bottle is filled half way
  • Add some boiled (and cooled) water to fill the bottle up

You have some gorgeous garden fresh room freshener!!!

Left overs of the infused plants can be strained and kept in a dark sealed jar in a cool place.

As the aromatic oils from the plants have been drawn out with basically pure alcohol, this will keep for at least three months, even more!

............................................................................................................... 
 NOTE: The publication of information regarding alternative therapies, herbalism, aromatherapy, and the like, in this blog does not constitute the practice of medicine, and this information does not replace the advice of your health care provider.

Friday, 28 March 2014

DIY: natural all purpose cleaner

Commercial cleaners are becoming increasingly expensive, there are wonder bottles for surfaces, super sprays for walls, and miracle cleaners for the bathroom. Look at the ingredients, many toxins and nasties, also all very similar despite being packaged for different uses, and expensive.. did i mention expensive?

I have just mixed up an all purpose stain removing, deodorising, non-toxic, disinfecting cleaner, poured it into a spray bottle, and a week's supply of this cleaner, cost me less than 30 C.


What you need:

An old trigger spray bottle (remove old labelling)
White vinegar
Bicarb
Eucalyptus essential oil
Tea Tree Essential oil
Boiled and left to cool tap water

What you do:

Label the spray bottle! (this is VERY important, it is a safety mechanism to ensure things are labelled correctly, and also provides you with information on how to mix the cleaner the next time, as well as pointing out that its for multi purpose use)

Pour into the bottle: 
(this is for a 500 ml bottle)

  • vinegar 50 ml
  • Water 400 ml (then top up after the bicarb has finished fizzing )
  • Add 5 drops each of the two essential oils
  • slowly sprinkle in the teaspoon of Bicarb (it will fizz, which is why you do this slowly)
  • wait till it stops fizzing then add the trigger nozzle 


Label it: Multi Purpose surface cleaner: caution do not spray directly onto grout (this is because of the acidic quality of the vinegar you need to be careful to use the cleaner sparingly and diluted near grout)

Ingredients(then add what the ingredients are )
this is the label i made for my cleaning solution!
I had run out of tea tree oil so my latest version doesn't include it.

You can make the label pretty, or just scribble on the bottle.

Either way you are now good to go.

It cleans, disinfects, and deodorises hard surfaces, and can also be used as a spot clean stain remover on soft surfaces (always test in an inconspicuous area of fabric before you use it )

I bought uber cheap generic supermarket vinegar and bicarb, re-used an old trigger bottle, and my only real expensive outlay was for the essential oils, which at 100% strength are used sparingly and will last for a long time.

So my all purpose cleaner costs me less than 30c a bottle.

What are your DIY cleaning products, I'd love to hear about them in the COMMENTS below.


...............................................................................................................
NOTE: The publication of information in this blog does not constitute the practice of medicine, and this information does not replace the advice of your health care provider.